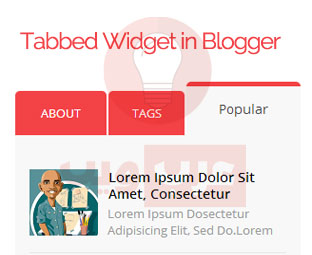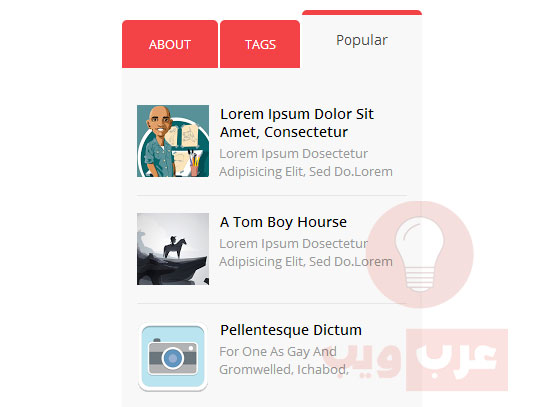
من الصورة توضح لك الأمر نعم عرفتها هي إضافة أصبحت شائعة بالقوالب ، بحيث تجمع ثلاثة أشياء في واحد لذا اليوم سأتطرق لكيفية وضعها بأي قالب بلوجر طبعا إن لم تكن لديك من قبل ، تتميز الإضافة الخاصة بالسيدبار بخفتها ومظهرها الجميل مصممة بأحدث التقنيات يمكن أن تضع فيها أي شيئ لذا أضن سأبدء بشرح طريقة التركيب .. على بركة الله

شرح طريقة التركيب
1 . نتوجه لقالب >> تحرير
2. ابحث بإستعمال CTRL+F عن <b:skin/><[[
3. ضع الكود التالي قبله [ فوقه ]
/* Tab Widget */
.tabviewsection {
background: #f8f8f8;
text-transform: uppercase;
border-bottom: 5px solid #f34246;
border-bottom-left-radius: 6px;
border-bottom-right-radius: 6px;
float: left;
width: 100%;
}
.tabs-widget {
list-style: none;
list-style-type: none;
margin: 0 0 10px 0;
padding: 0;
}
.tabs-widget li {
list-style: none;
list-style-type: none;
padding: 0;
float: left;
border-right: 2px solid #fff;
}
.tabs-widget li a {
color: #fff;
display: block;
padding-right: 16.5px;
padding-left: 16px;
font-size: 13px;
padding-top: 15px;
padding-bottom: 15px;
text-decoration: none;
border-top-left-radius: 5px;
border-top-right-radius: 5px;
}
.tabs-widget-content {
}
.tabviewsection {
margin-top: 10px;
margin-bottom: 10px;
}
.tags_tab {
width: 80px;
text-align: center;
}
.about_tab {
width: 96px;
text-align: center;
}
li.laster {
border: 0px;
width: 120px;
text-align: center;
}
.blog-mobile-link {
display: none;
}
.tabs-widget li a {
padding-right: 20px;
padding-left: 20px;
}
.tabs-widget {
height: 51px;
}
.tw-authors {
width: 570px;
}
.tabviewsection h2 {
display: none;
}
.tabs-widget li a.tabs-widget-current {
padding-bottom: 20px;
margin-top: -10px;
background: #f8f8f8;
color: #444;
text-decoration: none;
border-top: 5px solid #f34246;
font-size: 14px;
text-transform: capitalize;
}
.tabs-widget li a {
background: #f34246;
}
* هذه الخطوة هي ما قبل الأخيرة بمجرد إدراج الكود وحفظ القالب سيدرج لك ثلاثة أدوات بالتخطيط

4. إبحث عن : <div id='sidebar-wrapper'>
5. ضع أسفله مباشرة الكود التالي :
<!-- Tab Widget [start] -->
<div class='tabviewsection'>
<script type='text/javascript'>
  jQuery(document).ready(function($){
                $(".tabs-widget-content-widget-themater_tabs-1432447472-id").hide();
                $("ul.tabs-widget-widget-themater_tabs-1432447472-id li:first a").addClass("tabs-widget-current").show();
                $(".tabs-widget-content-widget-themater_tabs-1432447472-id:first").show();

                $("ul.tabs-widget-widget-themater_tabs-1432447472-id li a").click(function() {
                    $("ul.tabs-widget-widget-themater_tabs-1432447472-id li a").removeClass("tabs-widget-current a");
                    $(this).addClass("tabs-widget-current");
                    $(".tabs-widget-content-widget-themater_tabs-1432447472-id").hide();
                    var activeTab = $(this).attr("href");
                    $(activeTab).fadeIn();
                    return false;
                });
            });
 </script>
<ul class='tabs-widget tabs-widget-widget-themater_tabs-1432447472-id'>
  <li class='about_tab'><a href='#widget-themater_tabs-1432447472-id1'>About</a></li>
  <li class='tags_tab'><a href='#widget-themater_tabs-1432447472-id2'>Tags</a></li>
  <li class='laster'><a href='#widget-themater_tabs-1432447472-id3'>Popular</a></li>
</ul>
<!-- Tab Widget 1 -->
<div class='tabs-widget-content tabs-widget-content-widget-themater_tabs-1432447472-id' id='widget-themater_tabs-1432447472-id1'>
<b:section class='sidebar' id='sidebartab1' preferred='yes'>
 </b:section>
</div>

<!-- Tab Widget 2 -->
<div class='tabs-widget-content tabs-widget-content-widget-themater_tabs-1432447472-id' id='widget-themater_tabs-1432447472-id2'>
<b:section class='sidebar' id='sidebartab2' preferred='yes'>

 </b:section>
</div>

<div class='tabs-widget-content tabs-widget-content-widget-themater_tabs-1432447472-id' id='widget-themater_tabs-1432447472-id3'>
<!-- Tab Widget 3 -->
<b:section class='sidebar' id='sidebartab3' preferred='yes'>
</b:section>
</div>
</div>
<!-- Tab Widget [endt] -->
* بعد وضعك للأكواد نكون قد إنتهينا من القالب بإمكانك حفظ العمل والتوجه لتخطيط وسترى 3 أدوات مضافة بالجانب كل على حدة كما بالصورة بالأسفل .. أضف الأدوات التي تريد


ليست هناك تعليقات :
إرسال تعليق
=a= =b= =c= =d= =e= =f= =g= =h= =j= =k= =l= =m= =n= =o= =p= =q= =w= =x= =y= =z=